After downloading the .ipynb notebook file from D2L you should move (not copy) it to the drive and folder (directory) you’ll be working from. A good choice would be a folder under your H: drive. Do not work on files in the Downloads folder-- you will lose your work if the computer reboots.
But you will need to start Jupyter notebook in a folder above the folder with your file so that the Jupyter kernel can access it.
Here’s what I suggest you do in the lab:
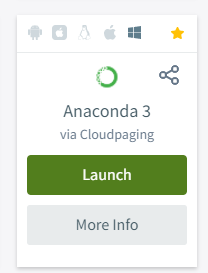
- Go to appsanywhere.bcit.ca
- Find the Anaconda 3 tile, click on Launch and wait for Anaconda Navigator to start up
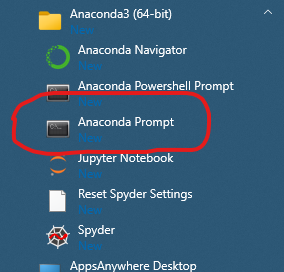
- Find and click on the Anaconda Prompt link in the Windows menu (don't use the Jupyter Notebook, Anaconda Navigator or Anaconda PowerShell Prompt links):
-
- this opens up a command prompt window:
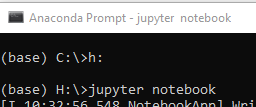
- Type the letter of the drive where you moved the notebook file followed by a colon (:) and <Enter>. The drive will typically be H: (for your network drive), or possibly E: for a local flash drive. The prompt should change to indicate you are on the correct drive (see above).
- Type jupyter notebook <enter> (see above). The jupyter notebook interface will open with a file browser at the root of the selected drive:
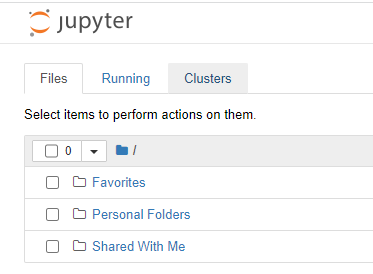
- Navigate to the folder where you moved the downloaded .ipynb file and click on it to edit it.
- Click on the floppy disk icon (
 ) periodically to save changes to your notebook.
- When you're finished, use the menu item File ► Close and Halt to stop the kernel (the background server process) and close the browser window.
- Upload the .ipynb file to the correct Assignment folder. Check the timestamp on the file (on the disk) to make sure you're uploading the modified version, not the version you downloaded.
- If you have any doubts, download your submission to a different file and open it to make sure the correct file was submitted.